In my recent post that began my mini series on Ethiopian cuisine, I featured berbere (the post is now updated with a recipe for berbere), an essential Ethiopian blend of spices that explodes with complex flavor. Another integral—and perhaps the most important—food item in Ethiopian cuisine is injera, a spongy sourdough flatbread that serves not only as a kind of bread, but also as an eating utensil. Ethiopians use injera to scoop up bites of their lentil, bean, meat, and vegetable sauces—called wats (or thick stew)—that typically top a large piece of injera.

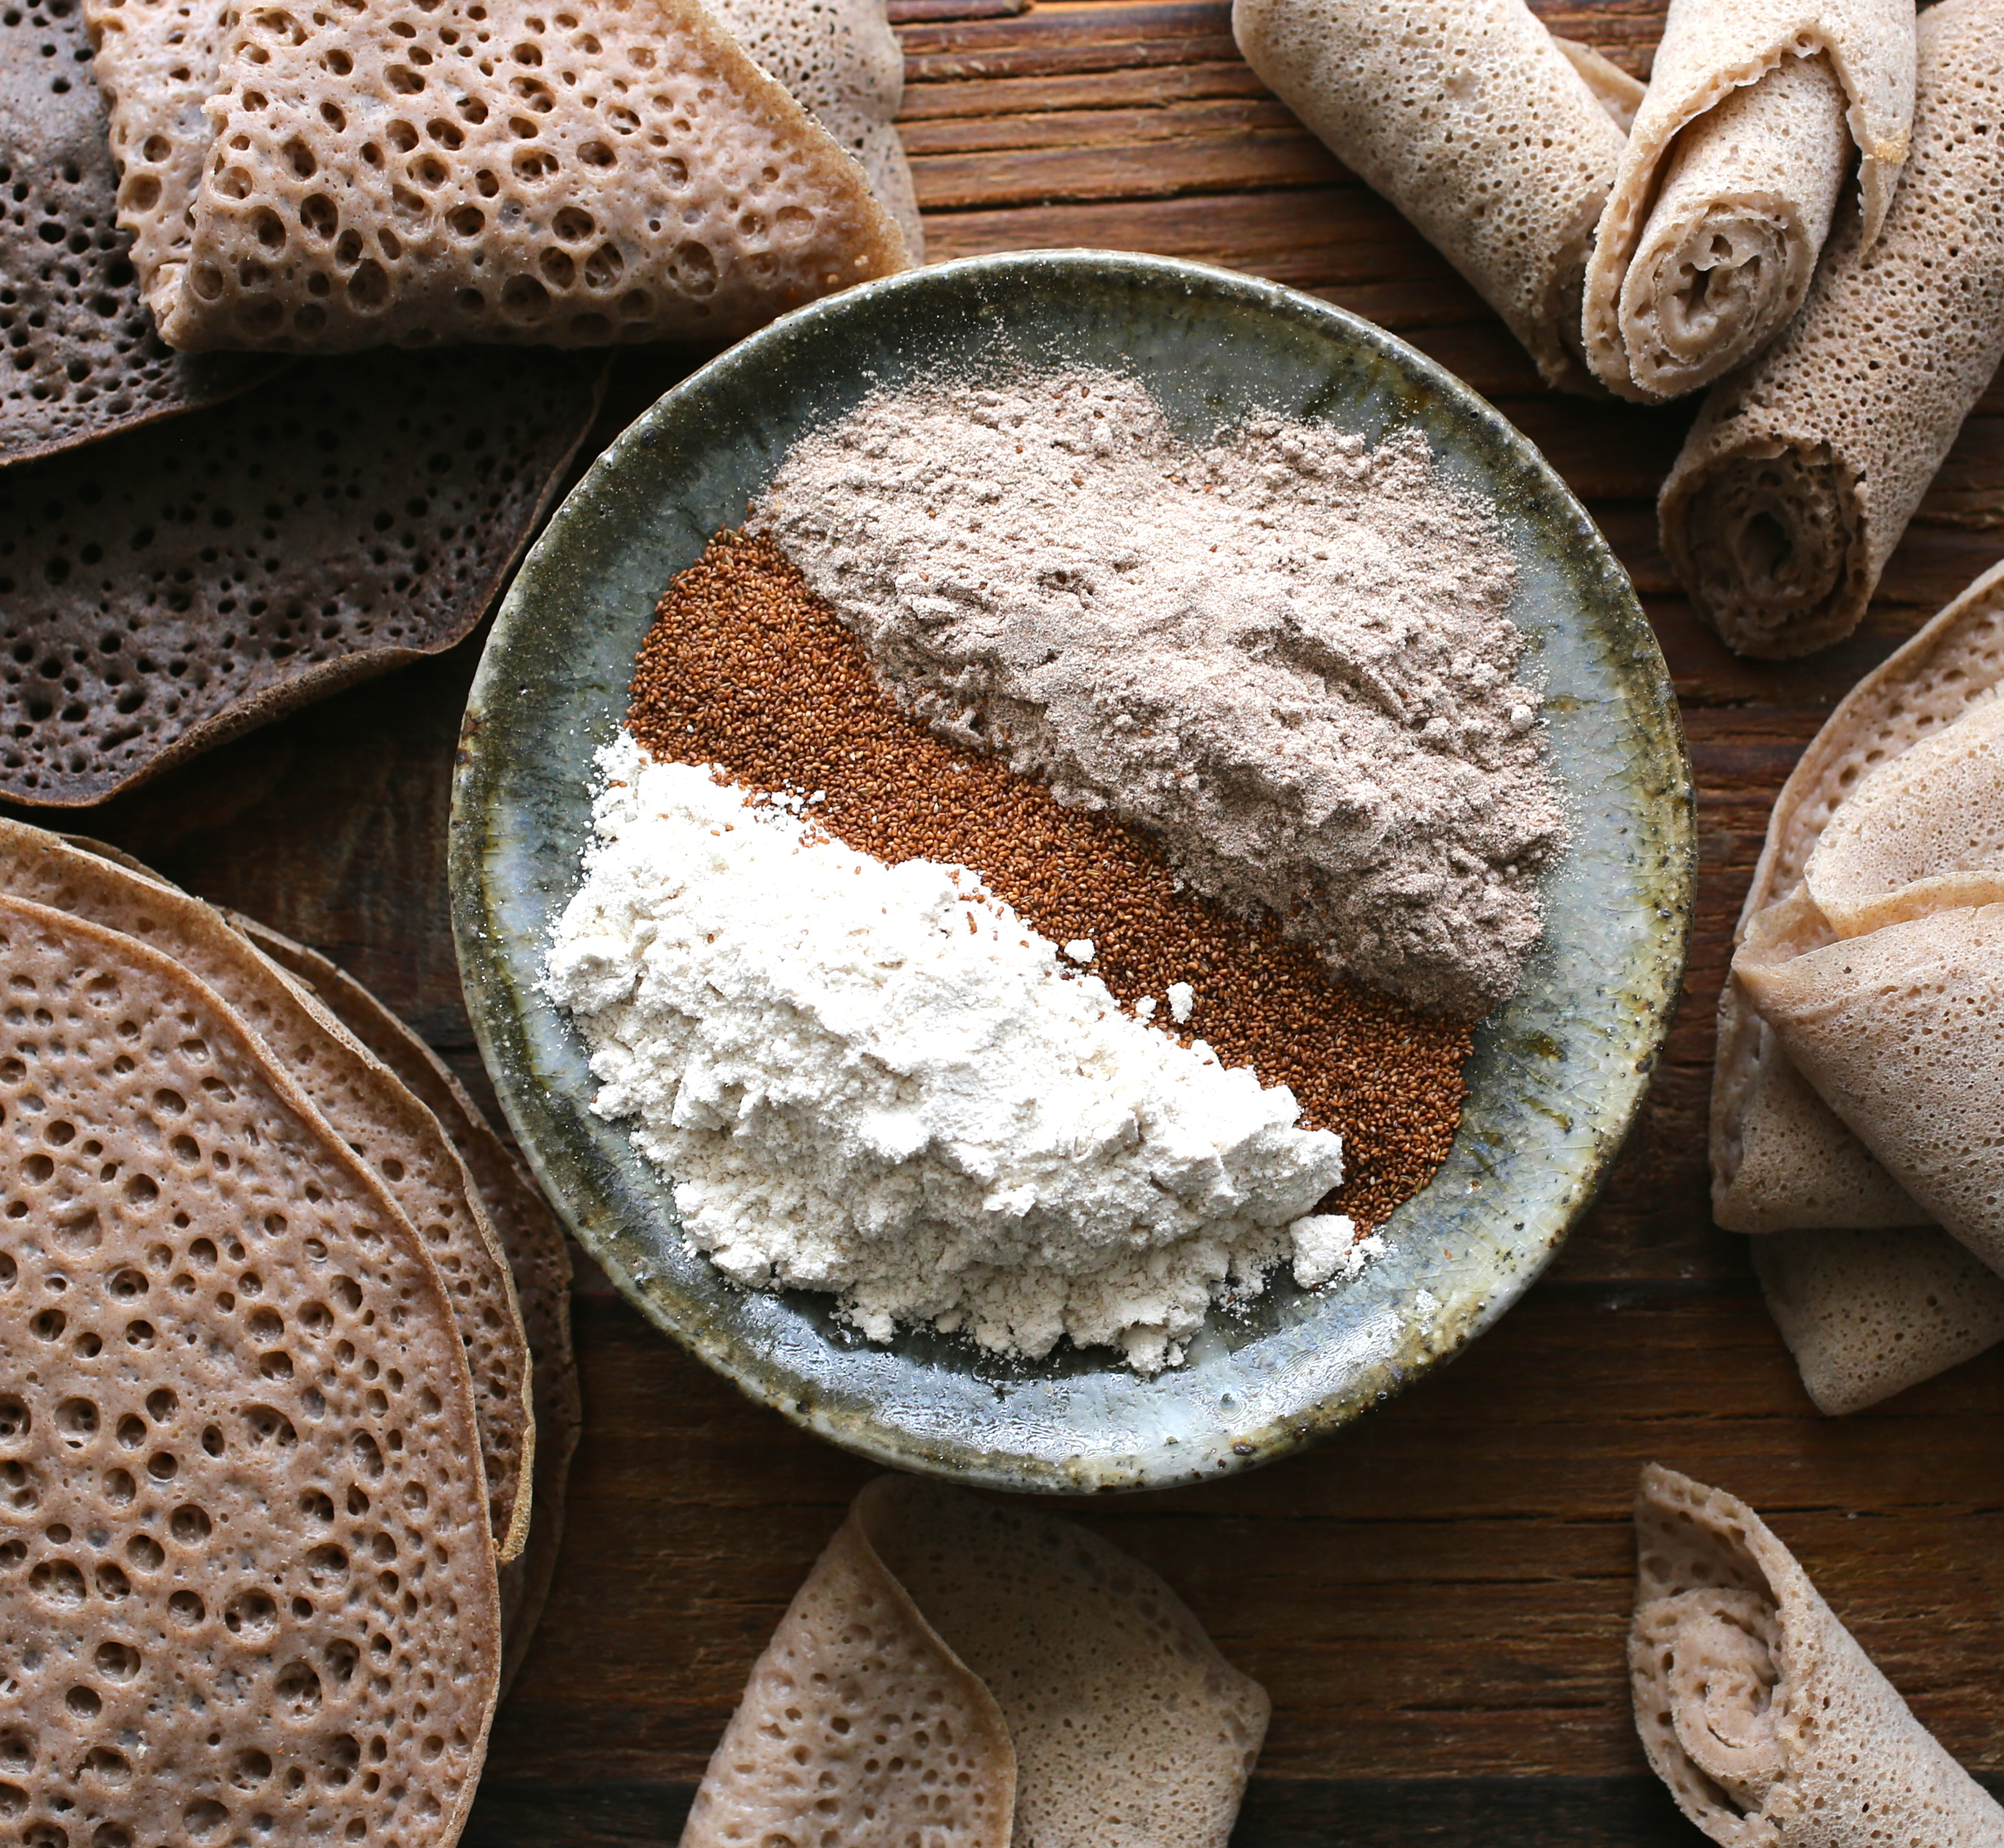
Made of fermented teff flour, injera is a great source of protein and vitamins. Teff, an ancient grain and believed to be the smallest grain in the world, is the most valued grain used to make injera. Iron-rich and very nutritious, teff has been a staple of Ethiopian cooking for thousands of years. It has all the amino acids required to be a complete protein. Teff flour is incredibly high in fiber, iron and calcium. Teff is also gluten free, but due to a variety of reasons that can range from cost to convenience to taste preferences, injera is often made with a blend of flours. Wheat, barley, corn and/or rice flours are a few that are sometimes used to replace some or all of the teff content. Another form of gluten free injera is made with a blend of teff and buckwheat flours.
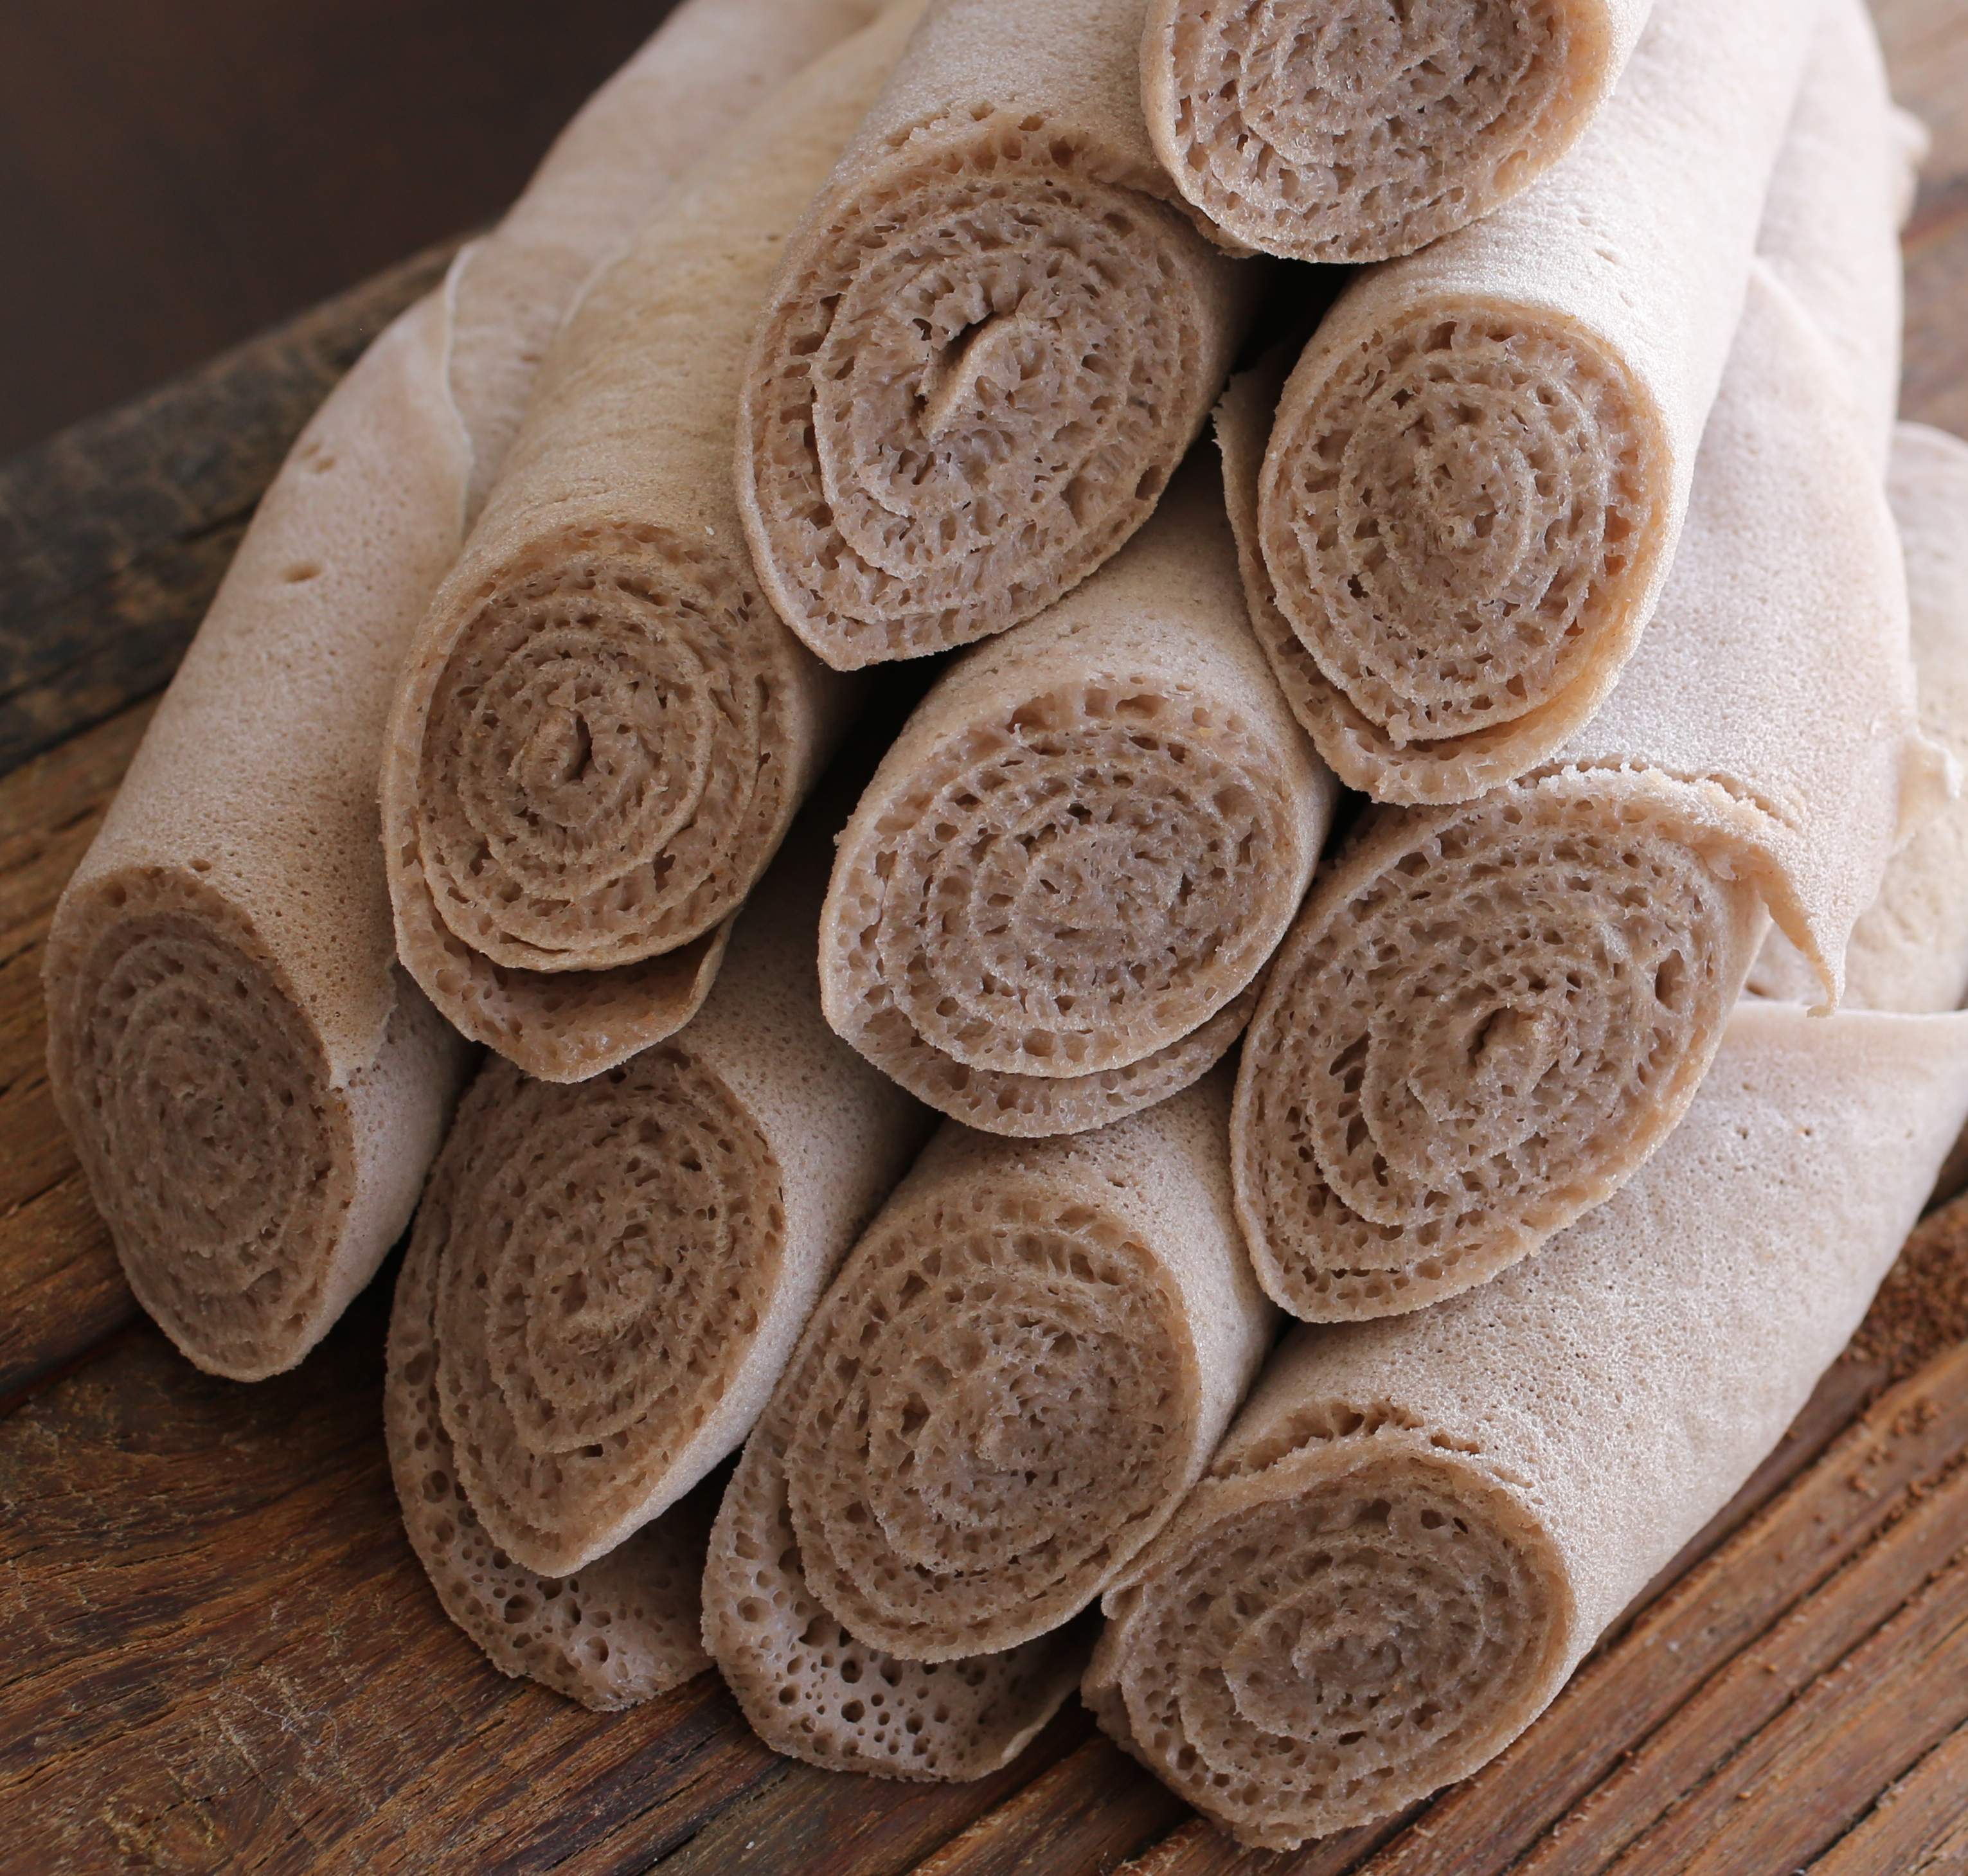
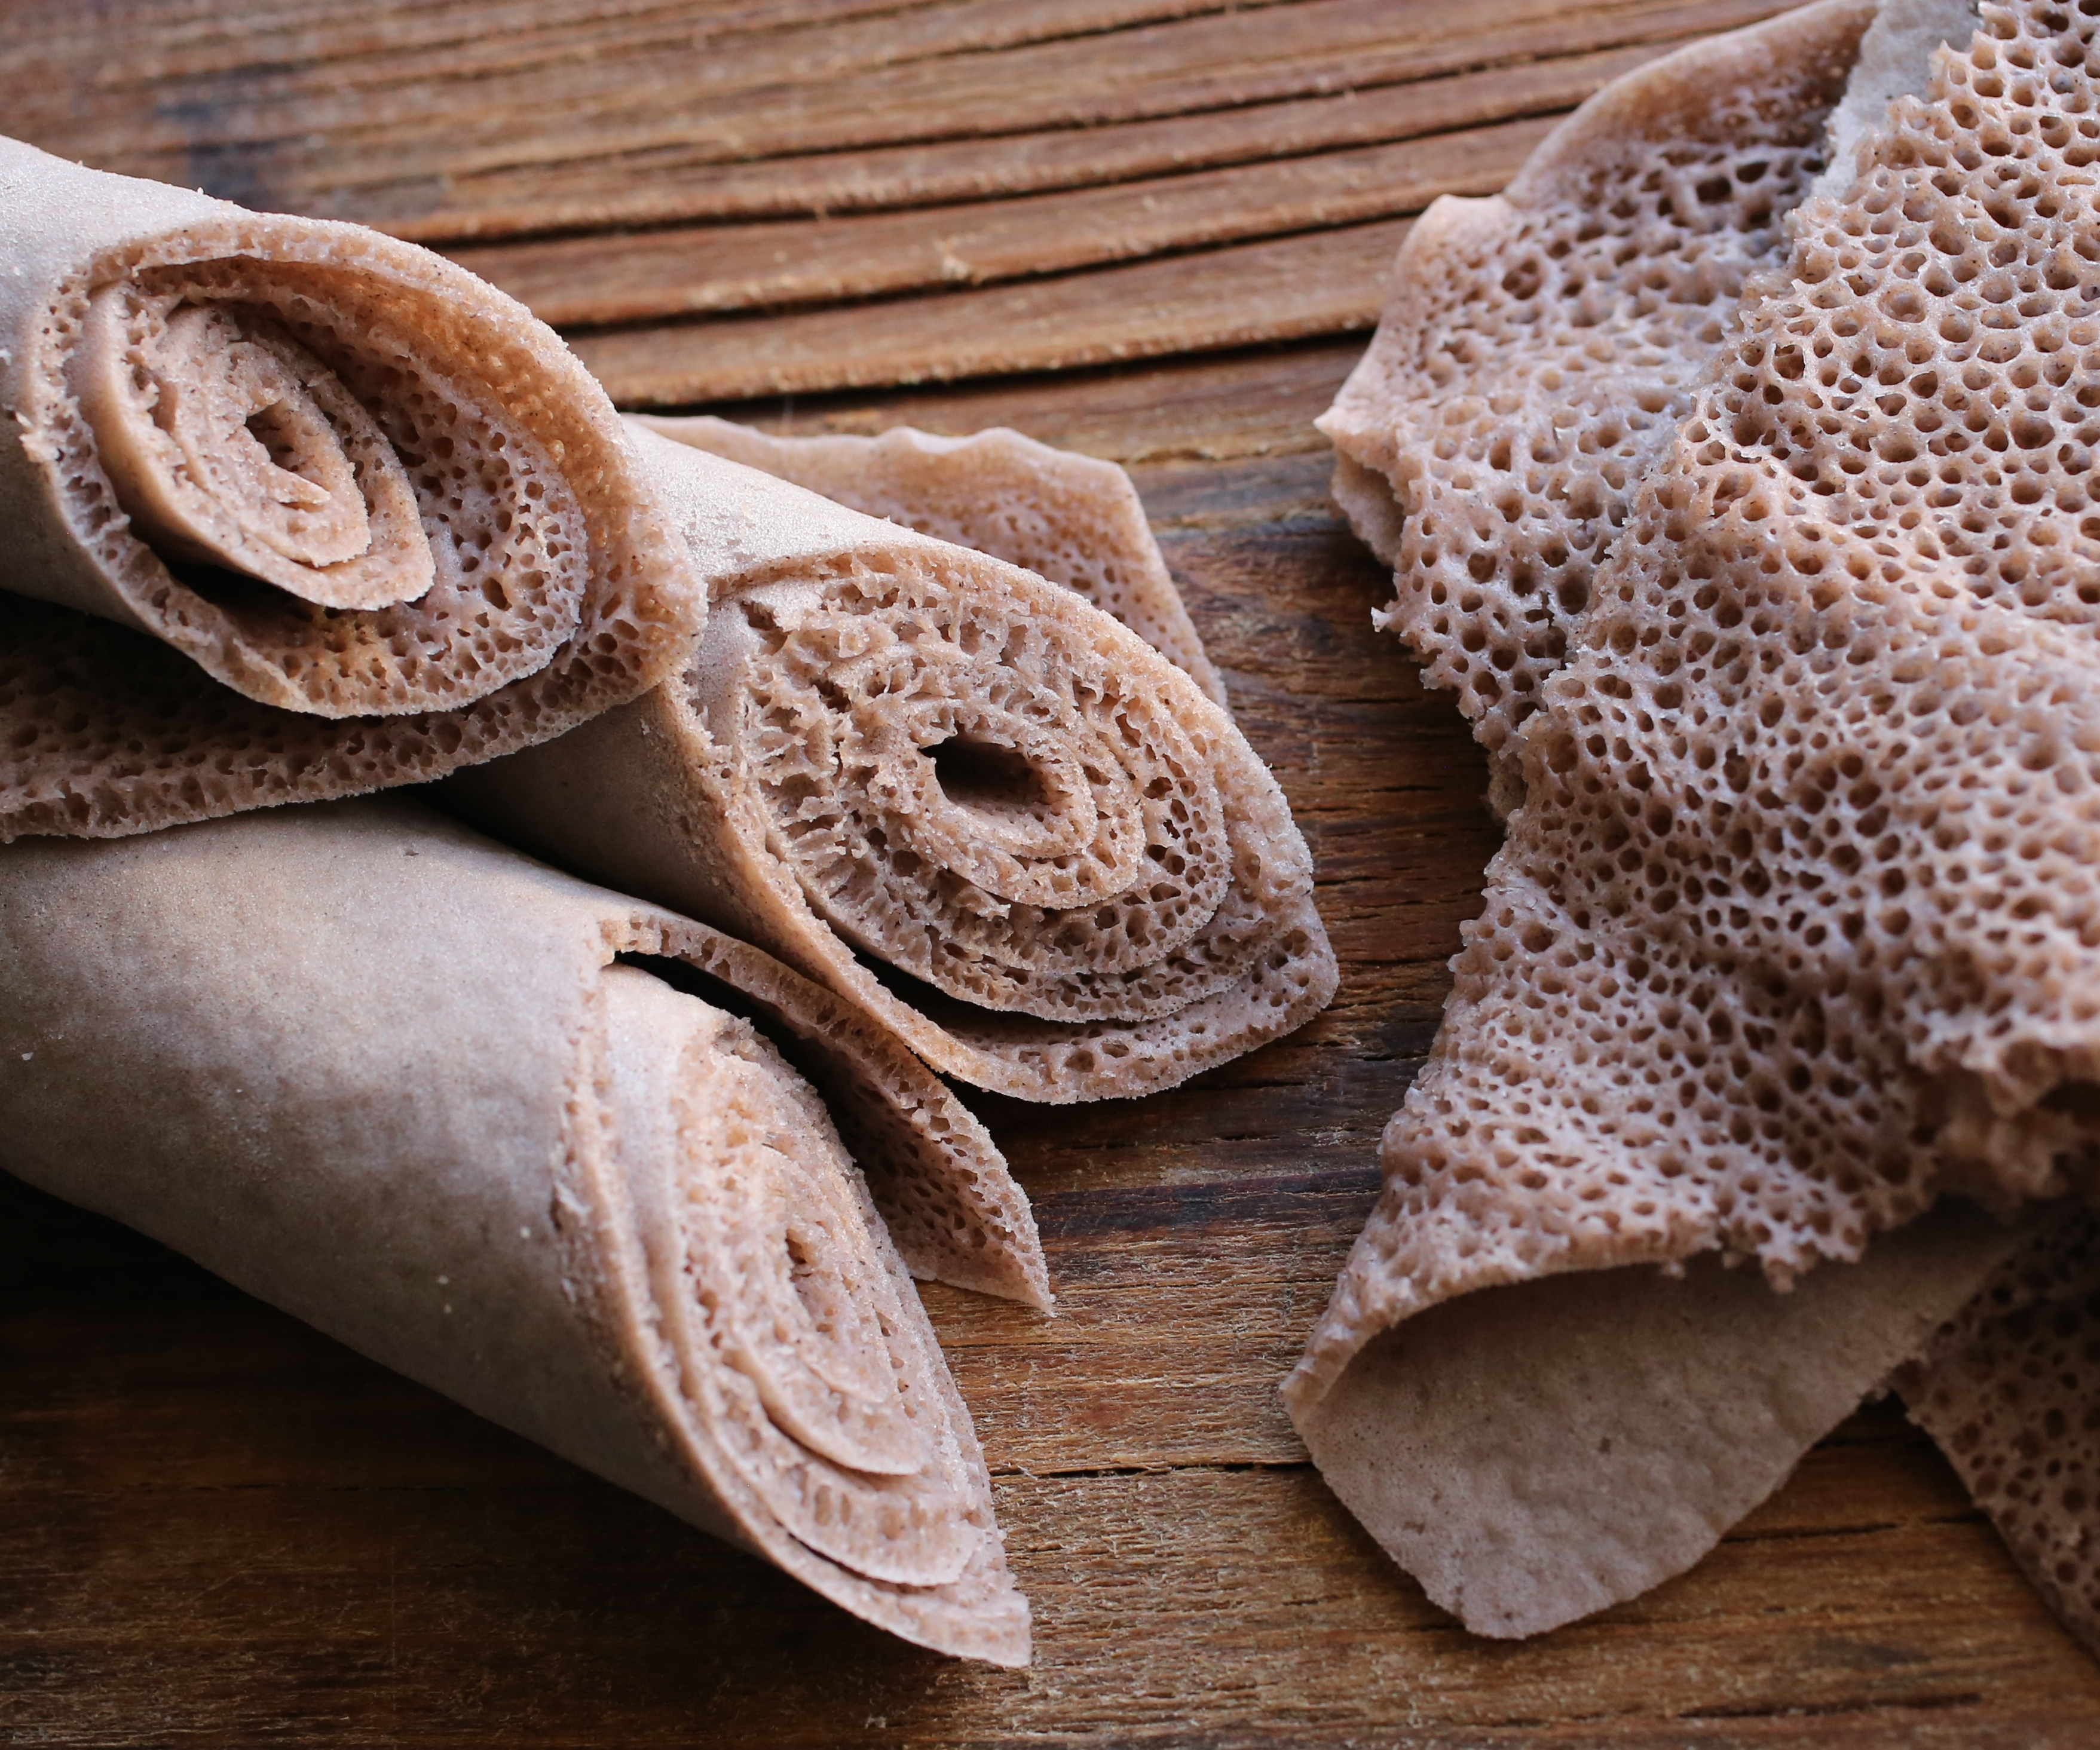
In making injera, teff (or a blend) flour is mixed with water and allowed to ferment for several days, similar to a sourdough starter. As a result of this process, injera has a mildly sour taste. After the fermentation process, the injera is cooked into a large, floppy, pancake, very similar to a French crêpe in shape, but not in size, texture or taste. When cooked, the bottom of the injera is relatively smooth while the top becomes porous, allowing the injera to be a good bread to sop and scoop up sauces and dishes.

When I planned to start this series on Ethiopian cuisine, the idea of making my own injera never crossed my mind. The Washington, D.C. area has a very large population of Ethiopians so I’m lucky to be within walking distance to a plethora of great Ethiopian restaurants, cafés, markets and grocery stores that sell injera. As making injera can take a significant amount of time and energy, its understandable why so many Ethiopians in this area would prefer to buy it instead of making it at home.
Gluten Free Injera
After I recently learned how to make several Ethiopian dishes. I took photos of the colorful wats, the platters of food, the spices, the artistically laid out injera, etc. I invited friends over to eat my Ethiopian food. We had fun. When I shared my photos with friends via texts, Instagram, Facebook, this blog, etc… people commented on the food, but the most asked question I received was something to the tune of, OMG!!! Did you make that injera too?????! I want the recipe!!! I responded that I had not, but after the umpteenth time, I got the message: Perhaps I should consider making my own injera. Although injera is easily accessible and available to me, it occurred to me that it may not be for you. This, and my own sense of culinary curiosity, gave me the motivation to try to make injera at home. I should first tell you that I know NOTHING about making bread. Nothing! Before last week, I had only made simple sweet breads. The thought of trying to make injera was a bit daunting. Although motivated, I was also a little intimidated.
Quick note: All the photos above are of injera purchased from a local market.
I didn’t have teff flour, but I already had teff in grain form in my cupboards. I found a recipe with instructions that said I could grind my teff grains into flour using a spice grinder. PROBLEM #1: this did not work! Teff is so small that a regular spice grinder cannot grind it into a fine powder. Many recipes I found online did not call for a starter (like a sourdough starter that starts the fermentation process). That was PROBLEM #2. Long story short, my first batch of “injera” turned into a disaster. It was quite literally one slodgy (is that a word?), goopy and sticky mess!

I then did some more research online, talked to more Ethiopians, sought advice on how to make a starter from a bread maker friend, and bought teff flour. My plan was to combine teff with barley and/or buckwheat flours.
When I had gone to a local Ethiopian market to buy teff and barley flours, I found they only came in large, 3-5 pound sacks! Way too much! I asked if they had smaller sacks. They didn’t. After I told the lady who ran the store of my plans to make injera, she looked at me as if to say, dear girl, you have no idea what you’re getting yourself into. You’ll likely need all that flour, and perhaps more. She was right, because I experimented, making several batches.
With all my ingredients on hand and a plan in place, I started by making a starter that night. I didn’t really know what I was doing, but there were two things that I was sure of—the fermenting process would take several days and I knew I wanted to try different ratios of flour blends, including one gluten free version. To save time, I considered this exercise in making injera as a science experiment and pulled out four bowls, starting the process with four different flour configurations. At the time, I was just hoping at least ONE of the four batters would yield something edible and hopefully it could be considered injera!
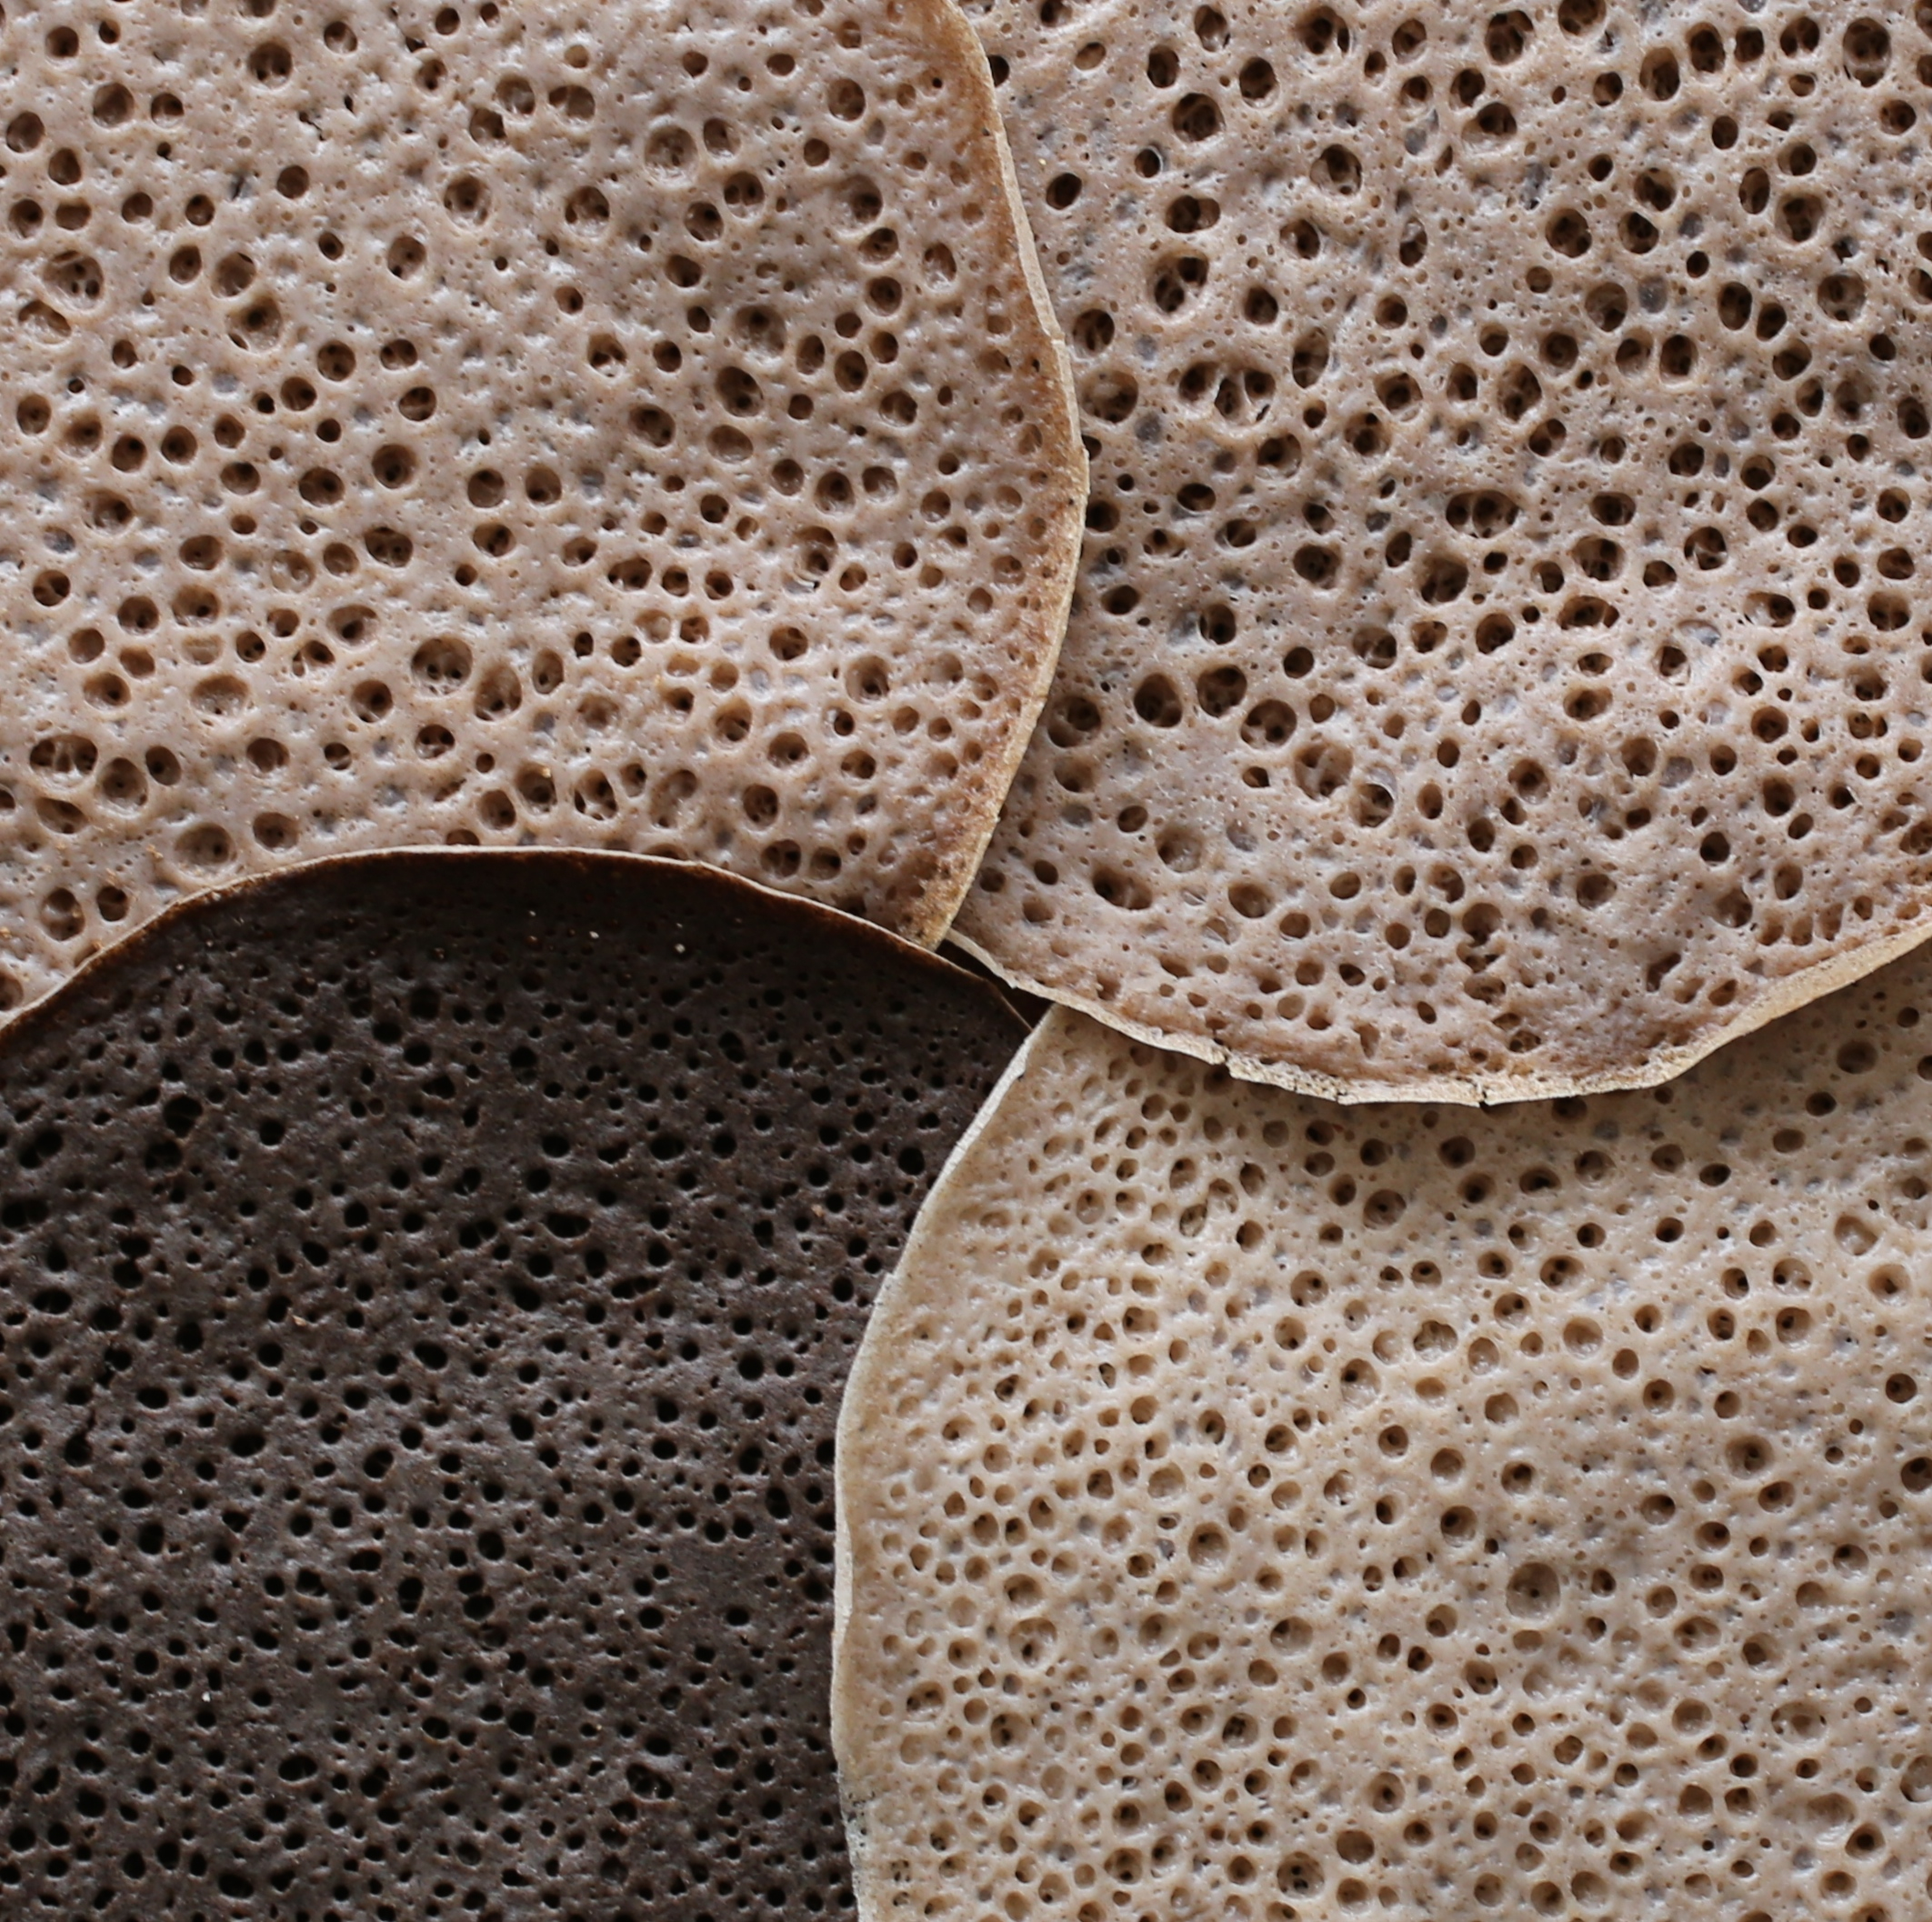
To make a very long story short, my four batters yielded the result you see in the photograph just above this paragraph. They’re not perfect. I’m sure there’s PLENTY of room for improvement in terms of texture and flavor, but I was pleased with the result.
In my short research, something I’ve learned that is critical when making injera is to ensure it has ain. Literally meaning “eyes”, ain is used by Ethiopians to describe those little bubbles/holes found in injera. If your injera doesn’t have ain, keep trying. Again, mine are not perfect, but they’re a start.

As soon as I cooked a few pieces of injera, I called my Ethiopian neighbor to come critique the results. Surprised to see homemade injera coming from my kitchen, she called friends, family and took photos to share. Yes!, I heard her say, she’s an American! No, she’s not Ethiopian! She just made injera, I’m looking at her cook it in her kitchen right now!!!! I took it as a good sign. I asked her to taste. She said she liked it. C’mon, I said, I want the truth, I won’t get hurt or offended if it’s bad.
Really, I like it, she said. It’s injera, I’d eat it. Then I asked if she had a favorite of the four. She chose my favorite too, the lightest one (bottom right) in the photo of the four above. For those of you who are interested in how I made the injera, the recipe below is for my favorite of the four. I’ll post details of all the flour blends and ratios I used, and purchasing resources in the notes section at the bottom of this post.
I’m sure the ratios and flour blends I tried can be altered to suit your personal taste preferences. As with other breads, some prefer whole grain, wheat, rye, sourdough, white, etc. Likewise, injera is a matter of personal preference. If you try your hand at making injera, feel free to experiment. I’m really glad I did. I’ve learned a lot and am already looking forward to making my next batch!
Injera
½ cup teff flour*, divided
3½ cups barley flour, divided
1 teaspoon yeast
water, luke-warm to room temperature (filtered and unfiltered)
Make the starter.
Mix ¼ cup teff flour, ¾ cup barley flour and 1 teaspoon yeast and 1 cup filtered water (I heard it was best to use filtered water in making a starter) in a bowl. Put the batter aside (I left mine on my kitchen counter) for 2-3 days to allow it to ferment. In this time, your batter will start to bubble and acquire the slight tanginess for which it’s known.
After I made the starter, I followed the process, but not the recipe, found on the blog, Burakaeyae. There, the author has a lot of information and youtube videos that are very helpful. She has a lot of information on her many experiences making injera. In my directions, I’ll use the same outline she has in regards to the steps in the process that are to occur after the starter is made:
Step One (the night before)
After your starter is ready, if any liquid has gathered on the top of your starter, discard the liquid. Mix starter with ¼ cup teff flour and ¾ cup barley flour. Using your hands, knead the dough for 7-10 minutes. This requires some “elbow grease”. As you continue to knead, the dough will form into a ball (it may even be a bit crumbly). After kneading, begin to add luke-warm (if it’s too hot it will kill the yeast) water just a little (about ¼ cup) at a time. Note: I didn’t use filtered water here, but I suppose you could. Continue to knead the mixture, slowly adding more water until the mixture has become quite thin and watery. The test is to put your hand in, then pull it out. You’ll know the consistency is right when the batter slips quickly off your hand, leaving behind just a thin residue of the batter. [This is when the videos from Burakaeyae are helpful]
Cover the starter with a lid or kitchen cloth and let it sit on your counter overnight.
Step Two (the next morning)
Gently stir the injera starter. After you’ve stirred it, you can save a portion to be used as starter for the next time you make injera.
Using a blender, blend the starter. The goal is to get rid of the gritty feel. Rub some of the starter between your fingers. If it feels smooth, with only a very slight amount of grit, then it’s done. Pour the starter into a clean container after you’ve blended it up.
Next, put 2 cups of barley flour in a large bowl. Add warm water to it and mix with your hand. The consistency needs to be soupy. After you do this, you’ll need to blend it up just like you did the teff starter. The goal of this step is to get the mixture smooth and free of lumps of flour. When finished, pour it into the container along with the teff starter.
Use your hand to thoroughly mix the two mixtures together. The final consistency should be thin and soupy. As before, a test is to dip your hand in and gauge how quickly the mixture slides off. If it leaves a thin residue, the consistency is right. If the consistency doesn’t seem right, you can thoroughly mix in more water a little bit at a time until it is right.
Cover it with a lid or kitchen cloth and let it sit on the counter. Check on it every hour or so. You will notice that the mixture will begin to rise. The more it rises, the better the injera will supposedly be. Once the rising subsides and the mixture begins to settle down, put it in the refrigerator for 45 minutes to 1 hour.
Step Three (the afternoon)
After the mixture has been in the refrigerator for about an hour, it is ready to cook.
Injera is traditionally cooked on a large, black, clay plate over a fire on a stove called a mitad. In urban areas, people typically use an electric mitad or a nonstick skillet. They’re about 16-inches in diameter. I don’t have a mitad so I used the only nonstick skillet I have, an 8-inch Scanpan. I tried using a cast iron pan and a large paella pan, both did NOT work. The Scanpan was perfect.
Heat an 8-inch nonstick skillet over medium-low heat. Pour in about ¼ cup of the batter, tilting and swirling the skillet to coat it evenly with batter. You do not want to pour too much into the pan as the injera will cook too thick and have a “bready” texture. The layer should be thin. Cook until bubbles appear (the ain) like pancakes and just set, about 1 minute. Cover and cook until the edges pull away slightly from the sides, about 1 minute more. Apparently you should not uncover it too quickly or often to check on it as that will affect the ain. So, keep the lid closed for about a minute.
Removing the injera can be tricky. Basically, you need to find something that is the size of the mitad or skillet and flat, like a thin cutting board or a flat spatula (like those used for crêpes). Ethiopians use a flat straw mat called a suffid. When the injera is done cooking, use your finger to gently lift one edge of the injera and quickly slide your flat surface underneath the injera. Set it down on a work surface. Wait for the injera to cool completely before stacking them.
Once cooled, wrap with plastic wrap until ready to serve. The injera may be stored overnight in the refrigerator; bring to room temperature before serving.
Notes: As mentioned above, you can save a portion of your starter to be used as the starter for the next time you make injera. I didn’t do this in step number two, but since I have extra batter leftover, I believe that it can be used as my starter for the next time I make injera.
For the four batters I had going, these are the flour combinations I used:
For the starter I used a total of 1 cup of flour:
Batter #1: 100% teff
Batter #2: 50% teff and 50% barley
Batter #3: 50% teff and 50% buckwheat (gluten free)
Batter #4: 25% teff and 75% barley
For Step Number One: I added another 1 cup of flour to the batter in the following flour ratios:
Batter #1: 25% teff and 75% barley
Batter #2: 50% teff and 50% barley
Batter #3: 50% teff and 50% buckwheat (gluten free)
Batter #4: 25% teff and 75% barley
For Step Number Two: I added 2 cups of flour to each batter:
Batter #1: 2 cups barley
Batter #2: 2 cups barley
Batter #3: 2 cups buckwheat (gluten free) and (this batter remained quite gritty even after blending)
Batter #4: 2 cups barley
My favorite of the four batters was Batter #4. It had the least amount of teff and was not only lighter in color, but also in texture and flavor. However, the next time I make injera I’d like to try adding more teff flour to Step Number 2 to see how that changes things. Yes, I did just say there is a next time. At first it seemed so complicated, but now that I’ve tried and have a bit of experience, I’m interested in improving my recipe and technique. I won’t have four batters going on at once so the process should be easier. I might also try a larger pan, perhaps a 10-inch.
Finally, my son LOVES injera. I’m not sure if it’s because of the flavor or the soft texture or both. Besides with Ethiopian dishes, I now also serve injera to him with non-Ethiopian foods. Sometimes I spread it with hummus and sprinkle with za’atar. Or, for another high protein and very nutritious snack, I spread injera with nut butters (almond or cashew butter). He loves is it!
All this to say, I’m glad I started the process of learning to make injera. The journey has been rewarding in many ways!
*Teff flour is available at Ethiopian markets and some grocery stores. Or, you can find it online at kalustyans.com, bobsredmill.com and other online sites. Injera can also be purchased already made from Zelalem Injera. I have no affiliation with any of the sites mentioned.

This bread is very nice, it looks like Algerian Baghrir but I know the texture and the color are different. Beautiful pictures too 🙂
Thank you! Glad you enjoyed the photos. I had to look up Algerian Baghrir. How interesting, they do look similar! I will have to ry to find some to taste! Thanks again!
The bread is sure beautiful to look at, and I can only assume, delicate and delicious. Quite a recipe story. Your tenacity made you successful. Wow.
Thank you Fae! It was a fun and very interesting process and learning experience!
I love going to Ethiopian restaurants and having these, but have always wondered how they’re made. They look a bit of a faff but still very interesting!
Thank you Charlotte! Making injera is a very interesting process! By the way, what is “faff”?
I tasted injera once at a community festival made by a lovely Ethiopian woman, she was making them on site with such skill, it blew my mind – congrats on braving making your own!
Hi! Thank you so much for commenting! I would imagine seeing such lovely work, as you saw, would be amazing! I still have much to learn when it comes to making injera, but learning the process has been so interesting! Thanks again!
i don’t understand . Why do you put it for 45m
To 1h in the fridge?
Hi! Thanks for your comment. Good question. As mentioned in the post, the process I followed is from the blog, Burakaeyae. The author learned to make injera from an Ethiopian friend and provides more information in her you tube videos in regards to the process she uses. You could perhaps increase or decrease the time refrigerated.
Beautiful pictures. I would love to make them at home, try to anyways 🙂
Where can I find the setata, the 16 inch injera cooling mat. It is woven. I cannot find it anywhere in the US. Would you know where I can find it? Online? Store? Location?
Hi Anita, thank you! Honestly, I am not sure. I did not use one when I made my injera, although it would have been easier if I had. I don’t know where you are located, but I would think if you could find an Ethiopian market, you might have some luck. The following website seems to carry woven cooling mats, but they are out of stock at the moment. Perhaps you can call them to ask when they will replenish their stock. http://shop.brundo.com/product.sc?productId=217. I hope that helps. There are plenty of Ethiopian markets in the DC area, I’m just not sure which of them may carry setatas. Good luck!
Great article! Your photo and its’ source have been featured on the World Food Guide website:
http://worldfood.guide/photo/injera_1114/
I make injera everyday lately in small quantities with Bob’s red mill teff flour and no other grain. I am not ethiopian but injera is my favorite food. Some recipes call for baking powder and lots of weird steps but all that is unnecessary. I take some of the batter from previous day and put it in the blender with water and more flour to the consistency of a loose crepe batter – I use a small pinch of salt though I hear that is not authentic. Let it sit till the next day and you are ready to cook. The first time put a 1/2 teaspoon of yeast to get it going, and I add a pinch now and then – Must keep it going and keep making at least every other day or the bacteria will get out of control! Don’t expect a lot of flavor the first day – it takes a few days to develop. When a “cool” fermentation aroma comes out, reminiscent of melons – you know you are on the right track! I discovered that injera takes a good balance of microorganisms! If it grows white mold on top from neglect you start over!
Hi …I m from India & love making different food.
… tried Ethiopian food in Dubai and loved it ..is
There any substitute for teff flour coz we don’t
Get teff grain or flour in India….pls let me know
Which other flour I can use …at least try!!
Thank you .
Monica
Thanks so much for your article! After one
flopped attempt, I happened to find your
article and, while I have much to improve,
following your method produced a much
improved result the first try! Your instructions
were so thorough without being overwhelming
or hard to follow – thank you!
I’m SO impressed by the methodical and scientific way in which you approachec your recipe research and testing! I’m a former chef (not Ethiopian) who loves Ethiopian food—at least as I’ve experienced it in restaurants. I’ll be honest, I probably won’t make injera from scratch (especially since my husband hasn’t a taste for it); I also have a pretty good Ethiopian restaurant in my neighborhood where I could buy injera, though that had never occurred to me! Maybe I’ll do that next time I cook up some red lentils or other Ethiopian recipe….
Thank you!
Alyssa
Thank you Alyssa!
Approx how much water is added to make it thin?